Introduction
There’s a moment every Honda enthusiast lives for: when the tachometer needle sweeps past 5,500 RPM and the engine note transforms from a composed hum to an exhilarating mechanical symphony. That distinctive surge of power, accompanied by a change in engine tone that can only be described as mechanical nirvana, is the hallmark of Honda’s legendary VTEC system engaging—or as enthusiasts affectionately call it, “VTEC kicking in.”
This ingenious piece of engineering—Variable Valve Timing and Lift Electronic Control—has been Honda’s signature technology since the late 1980s, setting their engines apart from competitors by effectively providing two engines in one: an efficient, smooth-running motor for daily driving and a high-revving powerhouse when performance is demanded. It’s a technology that has helped Honda build its reputation for creating engines that offer both efficiency and exhilarating performance.
But what happens when that magical VTEC moment doesn’t come? When you push the accelerator, watching the tachometer climb, anticipating that familiar surge of power and change in engine note—and nothing happens? Few issues are more disappointing to Honda owners than a VTEC system that fails to engage, robbing the engine of its dual personality and high-RPM performance.
VTEC problems can manifest in various ways: from the complete absence of that characteristic engagement, to check engine lights with specific VTEC-related codes, to rough running conditions or even damage to internal engine components if left unaddressed. The good news is that many VTEC issues stem from relatively simple and fixable problems that don’t require extensive mechanical knowledge or expensive parts. Deciding whether to tackle these yourself or visit a professional involves considering the costs outlined in our DIY vs. Dealership guide.
In this comprehensive guide, we’ll demystify Honda’s VTEC system, explain how it should function when working correctly, identify the most common causes of VTEC failure, and provide a methodical approach to diagnosing and resolving these issues. Whether you’re a DIY mechanic looking to restore your Honda’s performance or simply want to understand what’s happening before visiting a professional, this step-by-step troubleshooting guide will help you get your VTEC kicking in again.
Understanding Honda VTEC: How It Should Work
Before diving into troubleshooting, it’s essential to understand how VTEC functions when operating correctly. This knowledge provides the foundation for identifying what might be going wrong in your specific situation.

Basic Principles: The Dual-Personality Engine
At its core, VTEC is an elegant solution to a fundamental challenge in engine design: the tradeoff between low-RPM efficiency and high-RPM power. Conventional engines must compromise between these two goals, but VTEC effectively gives you two different engines in one:
- Low-RPM Mode (Economy): Below the VTEC engagement point, the engine operates with milder cam profiles that prioritize fuel efficiency, smooth operation, and low-end torque. This is ideal for normal driving conditions.
- High-RPM Mode (Performance): Above the VTEC engagement threshold (typically 4,500-6,000 RPM depending on the model), the system switches to more aggressive cam profiles that allow greater air/fuel mixture into the cylinders, optimizing high-RPM power at the expense of some efficiency.
This transition between the two modes is what creates the characteristic “VTEC kick” that Honda enthusiasts cherish.
Key Components of the VTEC System
The VTEC system consists of several critical components working in harmony:
- VTEC Solenoid (Spool Valve Assembly):
- The electromechanical “switch” that directs pressurized oil to activate the VTEC mechanism
- Typically mounted on the cylinder head, often with an integrated filter screen
- Controlled by the ECU based on engine operating conditions
- VTEC Oil Pressure Switch:
- Confirms that sufficient oil pressure exists to operate the VTEC mechanism
- Acts as a safety feature to prevent attempted engagement without adequate pressure
- Provides feedback to the ECU about system status
- ECU (Engine Control Unit):
- The “brain” that determines when VTEC should engage based on multiple inputs
- Monitors RPM, engine temperature, throttle position, and other parameters
- Sends the electrical signal to the VTEC solenoid when conditions are right
- Camshaft Lobes:
- Each cylinder has multiple cam lobes—typically two low-profile lobes for normal operation and one high-profile lobe for VTEC operation
- The different profiles determine how far and how long the valves open
- Rocker Arms and Locking Pins:
- Three rocker arms per cylinder (in most VTEC designs) that follow the cam lobes
- Hydraulically activated locking pins that connect the rocker arms together during VTEC engagement
- Allow the high-profile cam lobe to take control during VTEC operation
- Engine Oil:
- Often overlooked but absolutely critical to VTEC operation
- Must be clean and at the proper level to provide the hydraulic pressure needed
- Must be the correct viscosity as specified by Honda
Conditions Required for VTEC Engagement
The ECU will only engage VTEC when specific conditions are met:
- Engine RPM: Must exceed the threshold (typically 4,500-6,000 RPM depending on model)
- Engine Temperature: Must be at normal operating temperature
- Oil Pressure: Must be sufficient to activate the VTEC mechanism
- Vehicle Speed: Some models require a minimum speed for engagement
- Throttle Position: Many systems require significant throttle opening (indicating performance is needed)
If any of these conditions aren’t met, the ECU won’t command VTEC engagement, even if the system is mechanically sound.
Different Types of Honda VTEC Systems
Over the years, Honda has developed several variations of the VTEC system, each with unique characteristics:
- DOHC VTEC (Dual Overhead Cam):
- The original and most performance-oriented version
- Found in B16, B18C, and K20 Type R engines
- Switches between low and high cam profiles on both intake and exhaust sides
- Most noticeable “VTEC kick” when engaging
- SOHC VTEC (Single Overhead Cam):
- Simplified system used in D-series and some F-series engines
- Typically only affects the intake valves
- Less dramatic engagement but still provides performance benefits
- Examples include D16Z6, D16Y8 engines
- VTEC-E (Economy):
- Focused on efficiency rather than performance
- At low RPM, operates with 12 valves effectively (one intake valve per cylinder remains nearly closed)
- Switches to normal 16-valve operation at higher RPM
- Found in D15Z1, D16Y5 engines
- Less noticeable transition compared to performance VTEC
- i-VTEC (intelligent VTEC):
- Modern evolution combining VTEC with VTC (Variable Timing Control)
- Adds the ability to advance or retard cam timing in addition to changing valve lift
- Found in K-series, R-series, and newer engines
- Often includes features like variable intake manifolds for broader power bands
Understanding which VTEC system your Honda uses helps set appropriate expectations for how it should perform and narrows down potential issues when troubleshooting.
Symptoms of VTEC Malfunction
When the VTEC system isn’t functioning correctly, several symptoms may appear, ranging from subtle performance changes to obvious mechanical issues. Recognizing these symptoms is the first step in diagnosing the problem.
Lack of High-RPM Power (“VTEC doesn’t kick in”)
The most common and noticeable symptom is simply the absence of that characteristic surge in power and change in engine note when reaching the VTEC engagement RPM. The engine continues to accelerate linearly without the distinctive “step” in power delivery that VTEC provides. You might notice:
- Engine seems to “run out of breath” at higher RPMs
- Missing the distinctive change in engine sound
- Reduced acceleration in the upper RPM range
- Need to downshift more frequently for passing maneuvers
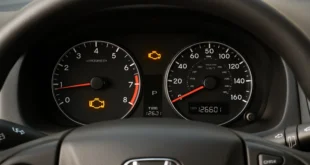
Check Engine Light (CEL) with VTEC-Related Codes
Modern Hondas will often illuminate the check engine light when VTEC issues are detected. Common VTEC-related diagnostic trouble codes include:
- P1259: VTEC System Malfunction
- P2646: VTEC Oil Pressure Switch Circuit Low Voltage
- P2647: VTEC Oil Pressure Switch Circuit High Voltage
- P2648: VTEC Solenoid Circuit Low Voltage
- P2649: VTEC Solenoid Circuit High Voltage
These codes provide valuable clues about the specific component that might be failing within the VTEC system. Refer to our guide on Decoding the Check Engine Light for more information on interpreting codes.
Hesitation or Bogging Down at the VTEC Engagement Point
Sometimes, rather than simply not engaging, the VTEC system may attempt to transition but fail to complete the process properly. This can cause:
- A momentary hesitation or stumble around the VTEC engagement RPM
- Feeling like the engine is fighting against itself
- Inconsistent power delivery in the mid-range RPMs
- “Hunting” sensation as the system repeatedly tries to engage and disengage
Rough Running or Stalling
In more severe cases, VTEC problems can cause drivability issues:
- Rough idle, especially after the engine has been running at high RPM
- Stalling when coming to a stop after aggressive driving
- Misfires or hesitation throughout the RPM range
- Inconsistent idle speed
Excessive Oil Consumption
While not always directly related to VTEC operation, some VTEC issues can contribute to increased oil consumption:
- Oil leaking from the VTEC solenoid or pressure switch
- Internal consumption due to worn valve guides or seals (more common in high-mileage VTEC engines, see The 200K Mile Honda for high-mileage care)
- Oil being pushed through the PCV system due to excessive blowby
Identifying which symptoms your Honda is exhibiting helps narrow down the potential causes and guides the troubleshooting process.
Common Causes for VTEC Failure
Now that we understand how VTEC should work and the symptoms of malfunction, let’s explore the most common causes of VTEC failure, starting with the most frequent and easily addressed issues.
1. Low or Dirty Engine Oil: The Most Common Culprit
Why it’s the #1 cause: VTEC is a hydraulically actuated system that relies entirely on oil pressure to function. Without clean oil at the proper level and viscosity, the system simply cannot operate as designed.
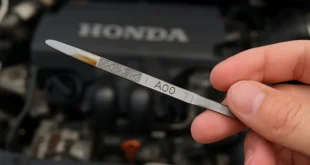
Oil Level Issues
- Too Low: Insufficient oil means inadequate pressure to activate the VTEC mechanism, especially at higher RPMs when oil is being distributed throughout the engine.
- Too High: Excessive oil can cause foaming, which reduces effective oil pressure and can lead to erratic VTEC operation.
How to Check: With the engine warm and on level ground, wait a few minutes after shutting off, then check the dipstick. The oil level should be between the minimum and maximum marks.
Oil Condition Problems
- Contaminated Oil: Sludge, metal particles, and other contaminants can clog the small oil passages and filter screens in the VTEC system.
- Degraded Oil: Oil that has broken down due to heat and age loses its ability to maintain proper pressure and lubrication.
How to Check: Oil should be amber to light brown and translucent. If it’s black, opaque, or has a burnt smell, it’s overdue for a change.
Oil Viscosity Issues
- Incorrect Viscosity: Using oil that’s too thick (especially in cold weather) or too thin can prevent proper VTEC operation.
- Viscosity Breakdown: Even the correct oil can thin out excessively if it’s been in service too long.
Proper Viscosity: Most Hondas require 5W-20 or 0W-20 for newer models, while older performance models might specify 10W-30. Always follow the recommendation in your owner’s manual or the Maintenance Minder system.
The Fix:
- Change the oil and filter using Honda Genuine or high-quality aftermarket filters.
- Use the exact viscosity specified in your owner’s manual.
- Consider an engine flush if sludge is suspected (though opinions vary on the safety of flushes).
- Establish a regular oil change interval—every 5,000 miles is a good rule of thumb for VTEC engines.
2. Faulty VTEC Solenoid (Spool Valve)
The VTEC solenoid is the electromechanical component that directs oil pressure to engage the VTEC mechanism. It’s a common failure point, especially in higher-mileage vehicles.

Function of the Solenoid
The solenoid contains an electromagnetic coil that, when energized by the ECU, moves a spool valve to redirect oil flow to the VTEC rocker arms. This pressurized oil flow pushes the locking pins that connect the rocker arms together.
Common Failure Modes
- Clogged Filter Screens: Small mesh screens inside the solenoid assembly can become clogged with debris, preventing proper oil flow.
- Electrical Failure: The electromagnetic coil can short or open circuit.
- Mechanical Sticking: The spool valve can become stuck due to sludge or debris.
- Gasket Failure: The gasket between the solenoid and cylinder head can leak, reducing oil pressure.
How to Test the Solenoid
Electrical Test:
- Locate the VTEC solenoid (typically on the cylinder head with a 1-2 wire connector).
- Disconnect the electrical connector.
- Using a multimeter, measure resistance across the solenoid terminals.
- Compare to specifications (typically 14-30 ohms depending on model).
Functional Test:
- With the engine off, disconnect and reconnect the electrical connector.
- Have an assistant turn the ignition to “on” (without starting).
- Apply 12V directly to the solenoid (consult a service manual for specific wiring).
- Listen for an audible click, indicating the solenoid is actuating.
Cleaning Clogged Screens
- Remove the VTEC solenoid assembly from the cylinder head.
- Carefully disassemble according to service manual instructions.
- Clean the filter screens with brake cleaner or carburetor cleaner.
- Inspect for damage or deterioration.
- Reassemble with a new gasket.
Replacement Options
- OEM Solenoid: Most reliable but most expensive option ($100-200 depending on model).
- Aftermarket Solenoid: Less expensive ($50-100) but quality varies significantly.
- Rebuilt Solenoid: Middle ground in terms of cost and reliability.
3. Faulty VTEC Oil Pressure Switch
The oil pressure switch serves as both a safety device and a feedback mechanism, confirming to the ECU that sufficient oil pressure exists to operate the VTEC system.
Function of the Pressure Switch
When oil pressure reaches the threshold required for VTEC operation (typically 15-20 psi), the switch closes an electrical circuit, signaling the ECU that pressure is sufficient. If this signal isn’t received, the ECU won’t command VTEC engagement.
Common Failure Modes
- Electrical Failure: Internal contacts can corrode or fail.
- Pressure Sensing Failure: The diaphragm or pressure sensing mechanism can become stuck or damaged.
- Oil Leaks: The switch can develop leaks that reduce system pressure.
- Wiring Issues: Connections to the switch can corrode or become damaged.
How to Test the Switch
Electrical Test:
- Locate the oil pressure switch (typically near the VTEC solenoid).
- Disconnect the electrical connector.
- With the engine running at normal operating temperature, use a multimeter to check for continuity across the switch terminals at idle (should be open) and at higher RPM (should close).
Pressure Test:
- Replace the switch with a mechanical oil pressure gauge.
- Monitor pressure at idle and at higher RPMs.
- Verify pressure meets specifications (consult service manual).
Replacement
- VTEC oil pressure switches are relatively inexpensive ($20-$50).
- Replacement is typically straightforward, requiring only basic hand tools.
- Use a new sealing washer during installation.
4. Wiring or ECU Issues
While less common than oil or solenoid problems, issues with the electrical wiring or the ECU itself can prevent VTEC engagement.
Wiring Problems
- Damaged Wires: Wires leading to the VTEC solenoid or pressure switch can become frayed, broken, or shorted due to heat, vibration, or rodent damage.
- Corroded Connectors: Connectors can corrode, causing poor electrical contact.
Diagnosis: Requires careful visual inspection of the wiring harness and continuity testing with a multimeter.
ECU Malfunctions
- Software Glitches: Rare, but ECU software issues can sometimes affect VTEC operation.
- Hardware Failure: Even rarer, internal ECU component failure can prevent the VTEC signal from being sent.
Diagnosis: Requires advanced diagnostic tools (like the Honda HDS) to monitor ECU commands and parameters. ECU replacement is expensive and typically a last resort.
5. Mechanical Issues within the VTEC System
These are the least common but potentially most serious causes of VTEC failure, involving problems with the internal mechanical components.
Stuck Locking Pins
- The small pins within the rocker arms that lock them together can become stuck due to sludge, debris, or wear.
- Diagnosis often requires disassembly of the valve train.
Worn Camshaft Lobes
- Extreme wear on the high-profile VTEC cam lobes can reduce valve lift, diminishing the VTEC effect.
- Typically occurs only in very high-mileage engines or those suffering from severe lubrication issues.
- Diagnosis requires measuring cam lobe height.
Rocker Arm Problems
- Worn or damaged rocker arms can prevent proper VTEC engagement.
- Diagnosis requires valve cover removal and inspection.
Valve Adjustment Issues
- Incorrect valve lash (clearance) can sometimes interfere with proper VTEC operation, though this is less common.
- Regular valve adjustments are important preventative maintenance for VTEC engines.
Diagnosis: Mechanical issues usually require professional diagnosis involving valve cover removal and potentially further engine disassembly.
Step-by-Step Troubleshooting Process
When faced with a VTEC issue, follow this systematic approach to avoid unnecessary parts replacement:
- Check the Basics First:
- Verify engine oil level, condition, and viscosity. Perform an oil change if needed.
- Ensure the engine is reaching normal operating temperature.
- Check for any obvious oil leaks around the VTEC solenoid or pressure switch.
- Scan for Codes:
- Use an OBD-II scanner to retrieve any stored diagnostic trouble codes.
- Pay close attention to VTEC-specific codes (P1259, P2646-P2649).
- Address Codes Systematically:
- If codes point to the oil pressure switch (P2646/P2647), test or replace the switch.
- If codes point to the solenoid circuit (P2648/P2649), test the solenoid electrically and functionally. Check wiring.
- If P1259 (VTEC System Malfunction) is present, it often indicates an issue confirmed by the pressure switch (e.g., low pressure despite solenoid activation).
- Test the VTEC Solenoid:
- Perform electrical resistance test.
- Perform functional click test.
- Remove and clean filter screens if accessible.
- Test the VTEC Oil Pressure Switch:
- Perform electrical continuity test at idle and high RPM.
- Consider replacing if tests are inconclusive or if leaks are present.
- Inspect Wiring:
- Carefully examine wires and connectors for the solenoid and pressure switch.
- Check for continuity and shorts if electrical codes persist.
- Verify ECU Parameters (Advanced):
- Use an advanced scanner to monitor ECU commands for VTEC engagement and feedback from the pressure switch.
- Consider Mechanical Issues (Professional Help Recommended):
- If all electrical and hydraulic checks pass but VTEC still doesn’t engage, suspect internal mechanical issues (stuck pins, worn cams).
- This typically requires valve cover removal and inspection by an experienced technician.
Conclusion: Restoring Your Honda’s Dual Personality
A non-functioning VTEC system can be a major disappointment for any Honda owner, diminishing the driving pleasure and performance that makes these vehicles special. However, by understanding how the system works and following a logical troubleshooting process, most VTEC issues can be diagnosed and resolved effectively.
Remember the most common culprits:
- Start with the oil: Proper level, cleanliness, and viscosity are paramount.
- Check the solenoid and pressure switch: These components are frequent failure points.
- Don’t overlook wiring: Simple connection issues can mimic component failures.
Addressing VTEC problems promptly not only restores performance but also prevents potential long-term engine wear. Whether you tackle the diagnosis and repair yourself or use this guide to have a more informed conversation with your mechanic, taking action will help ensure your Honda continues to deliver both efficiency and exhilaration for many miles to come. Keeping up with maintenance, is key to preventing many VTEC issues in the first place.